How to Work out which symbols represent which stitch
Do you shy away from using Crochet Charts? I know I did when they were new to me. What do these crazy symbols mean? And why would I use them rather than written instructions? In this blog post: Crochet Chart Symbols, I will lead you through why using Crochet Charts is a great idea, and show you some short cuts to helk you recognise how to work each stitch from the symbol.
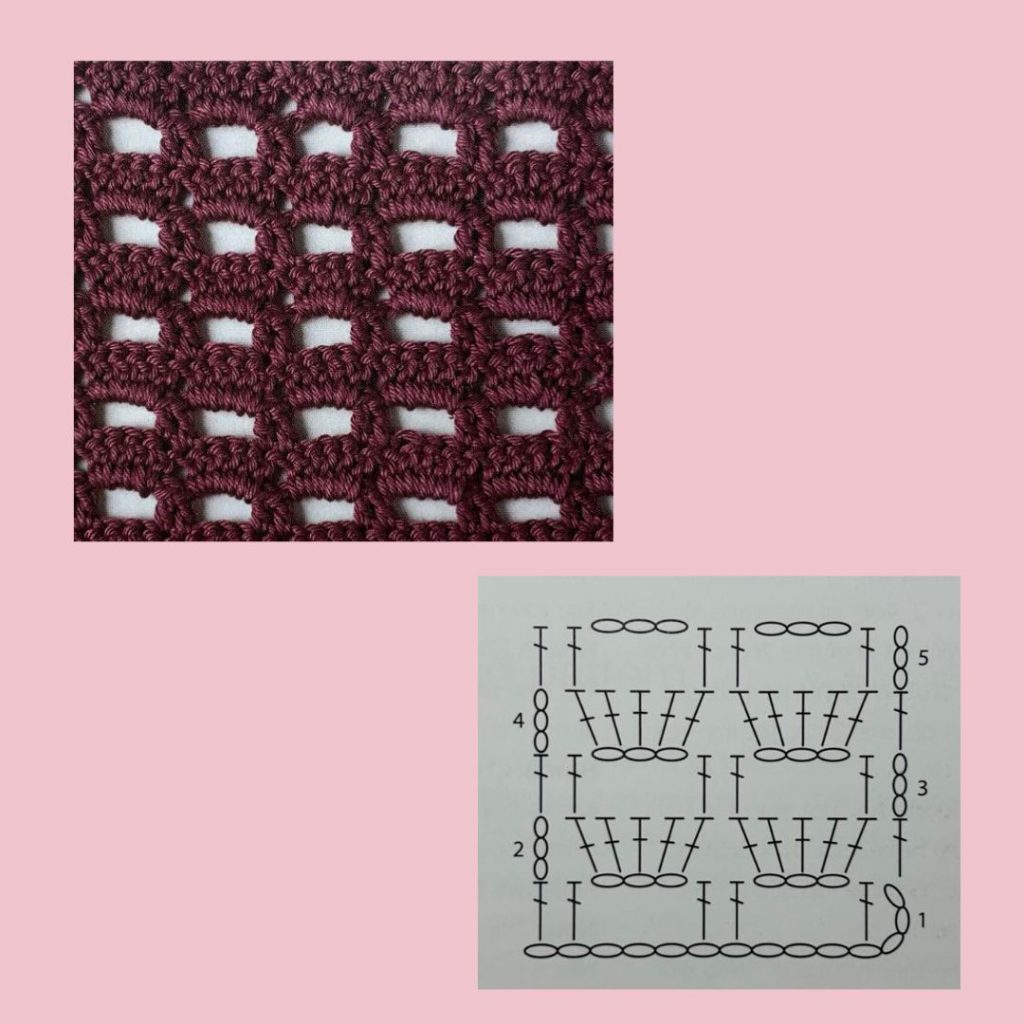
There are a number of reasons why I recommend using charts, but in my opinion the overriding one is that the charts LOOK like the final fabric you make, so that all along the way you can be sure that the pattern you are working on is coming out how it should.
Here is an example of a Block Stitch pattern. See how the chart is a cut down version of the sample. Visually it looks the same although it only shows a small section.
UK versus US naming terminology for Crochet Chart Symbols
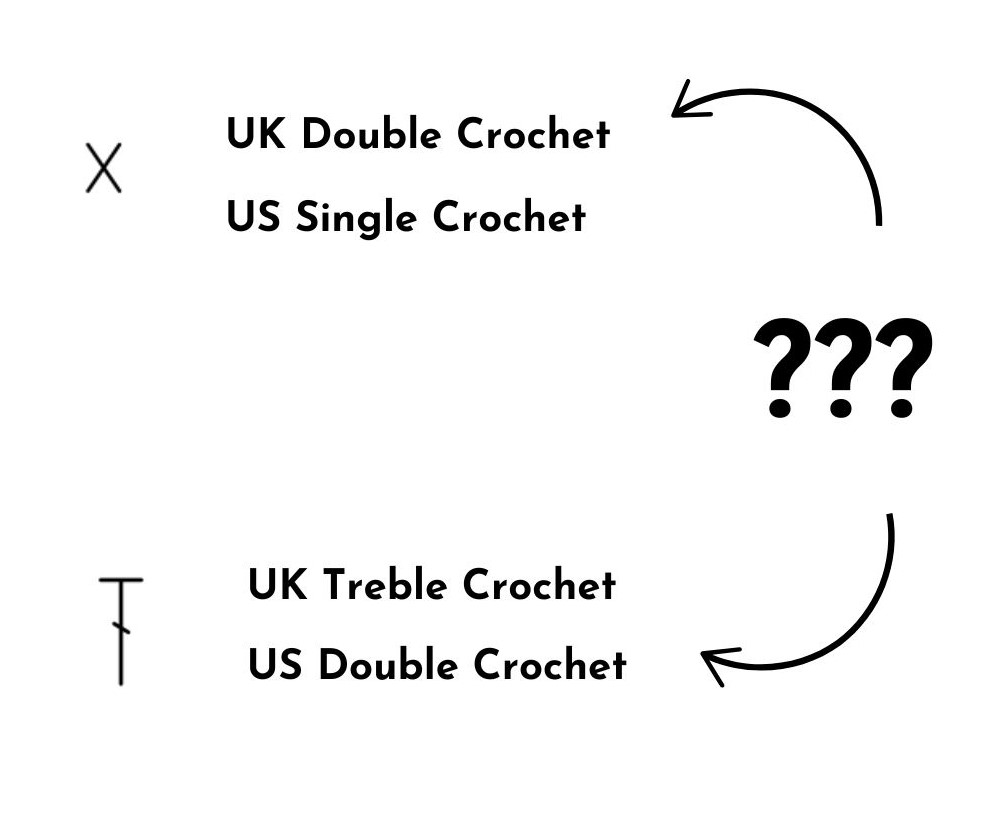
Secondly, have any of you been caught out by the UK vs US stitch naming conventions? I was when I started out crocheting. Not only is the stitch name for one stitch different between the two terminologies, but worse than that the same name is used for two different stitches ! Ouch….. Using charts instead of written instructions can help here.
Smallest to Largest Crochet Chart Symbols
Chain Stitch Symbol
OK – so if you are wary of using patterns where there are only crochet charts and no written instructions, let’s break things down.
Most patterns start with the humble chain stitch. In terms of the symbols used it is one of the most obvious – a little oval. Quite often a pattern will start with a row of chains – a foundation row like this. Stitches will then be drawn on top of the chains showing which chain to work which stitch into.

Slip Stitch Symbol
The Slip stitch is often used to join the end of rounds, but it can also be used in stitch patterns to vary the height of combined stitches. It is represented by Just a simple dot!

UK Double / US Single Crochet Stitch Symbol
The next stitch up the size ladder is the UK Double or the US Single stitch. Here we venture into the two names for the same thing scenario BUT do not despair – when looking at Charts the symbol is the same.
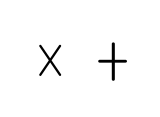
Having said that, there are two interchangeable symbols for this stitch; both are recognised on each side of the pond. They are a vertical (plus sign) cross or a diagonal ‘X’ cross.
Work this stitch by placing your hook into the stitch you are working into, yarn over your hook and pull the yarn through that stitch. You will now have two loops on your hook. Now yarn over your hook once more and pull the yarn through both loops on your hook to complete the stitch.
YAY! Now things get interesting….
For all following stitches you can use HOW the symbol is drawn to work out WHAT to do…
Going further up the size scale, all bigger stitches have a small horizontal line across the top of a vertical line. Some also have a small horizontal (or slightly tilted) line, or multiple lines, across the centre of the vertical line.
Any stitch with a line across the top starts with at least one yarn over before inserting the hook into the stitch, yarning over and pulling through.
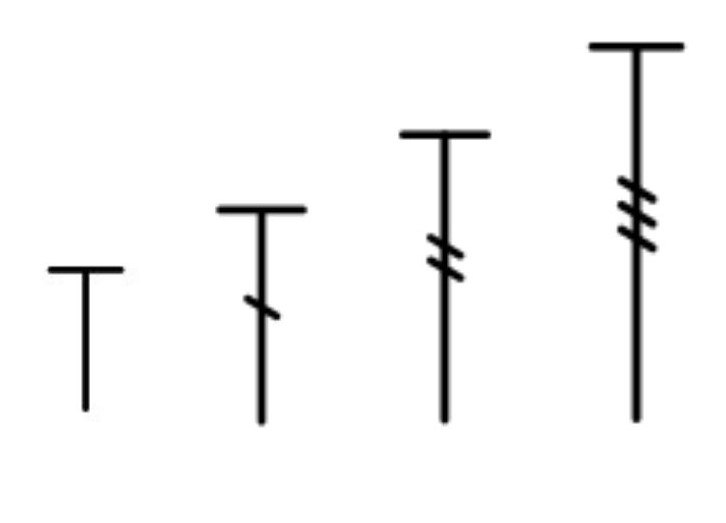
We will see how to use these lines to see how to work the stitch! No matter whether you follow US or UK naming conventions, the symbols are always the same, so you can use these horizontal lines as your guide.
For the purposes of explanation I will refer to these lines as ‘horizontal’ throughout, even though they may be at a slight angle.
UK Half Treble / US Half Double Crochet Stitch Symbol
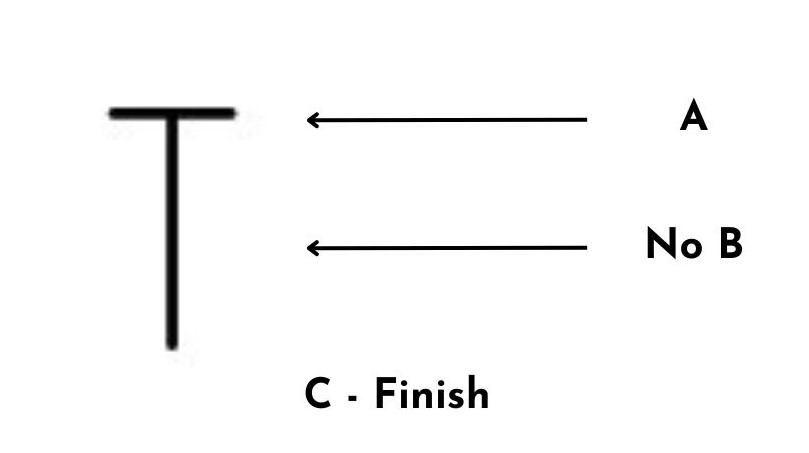
This symbol is the exception to the rule – there is nothing to do at point B!
A. For this stitch we yarn over ONCE, insert the hook into the stitch, yarn over and pull through.
B. As there are no horizontal lines in the centre of the stitch, we do nothing here.
C. We now FINISH the stitch immediately by yarning over and pulling through all 3 loops on the hook – DONE.
UK Treble / US Double Crochet Stitch Symbol
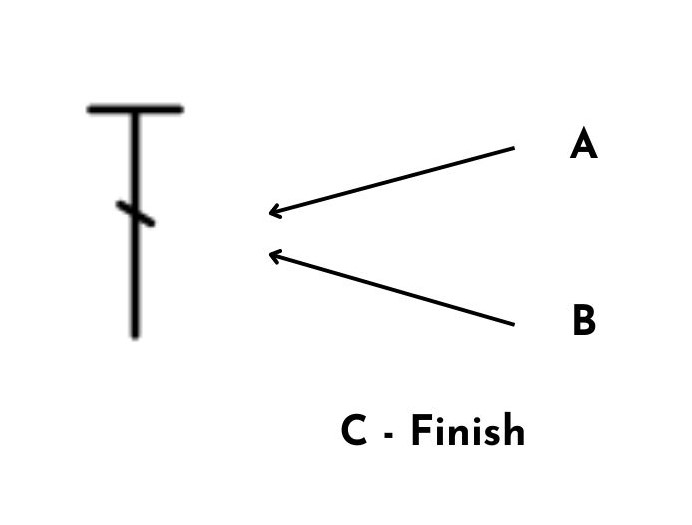
There is one horizontal bar across the centre of the vertical bar: this tells you to:
A. Yarn over ONCE (one centre horizontal bar), insert the hook into the stitch, yarn over hook and pull through (3 loops on hook).
B. Yarn over, pull through 2 loops ONCE (one centre horizontal bar).
C. We now FINISH the stitch by yarning over and pulling through the two loops left on the hook.
UK Double Treble / US Treble Crochet Stitch Symbol
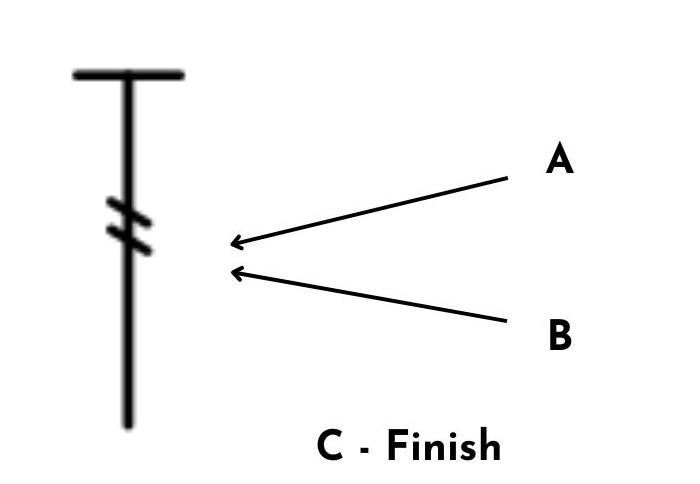
There are two horizontal bars across the centre of the vertical bar: this tells you to:
A. Yarn over TWICE, insert the hook into the stitch, yarn over hook and pull through (4 loops on hook).
B. Yarn over, pull through 2 loops TWICE.
C. We now FINISH the stitch by yarning over and pulling through the two loops left on the hook.
UK Triple Treble / US Double Treble Crochet Stitch Symbol
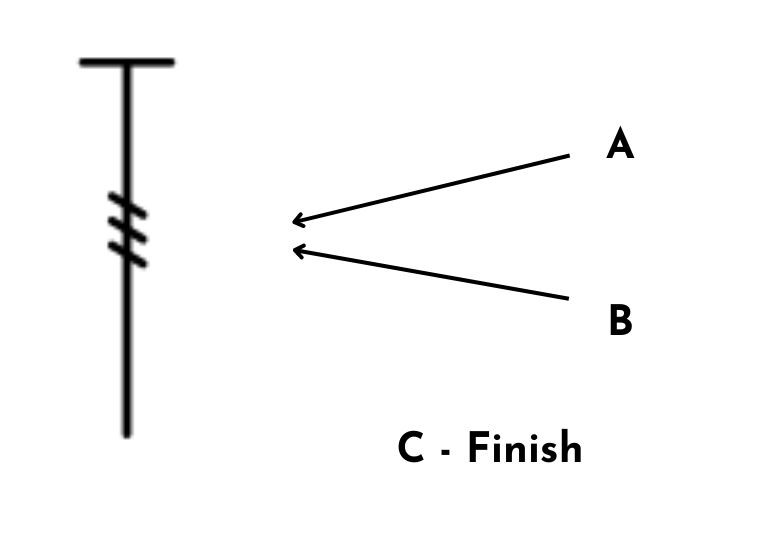
There are three horizontal bars across the centre of the vertical bar: this tells you to:
A. Yarn over 3 TIMES, insert the hook into the stitch, yarn over hook and pull through (5 loops on hook).
B. Yarn over, pull through 2 loops 3 TIMES.
C. We now FINISH the stitch by yarning over and pulling through the two loops left on the hook.
And there you have it…
For every stitch larger than this work it in the same way, i.e. by adding one more yarn over at the start of the stitch and one more ‘yarn over pull through 2 loops’ for each extra horizontal line.
My next post on Crochet Chart Symbols will show how they are combined to create stitch patterns. I hope this one ‘Crochet Chart Symbols’ has been helpful and has inspired you to start using Crochet Symbol Charts.
You can find more useful Knitting and Crochet tutorials on my YouTube Channel
See how you can use your Knitting or Crochet knowledge at Cool Wool School to build you own business working as a tech editor,
Find my crochet and knitting patterns here

